How to Set Slippage Tolerance on Any DEX (2026)
— By Tony Rabbit in Tutorials

Learn how to set slippage tolerance on Uniswap, Jupiter, Raydium, and PancakeSwap, with practical ranges by token type and tips to avoid failed swaps.
What Is Slippage?
Slippage is the difference between the price you expect to pay when you submit a trade and the actual price you pay when that trade executes on the blockchain. It's unavoidable on decentralized exchanges because of how blockchain transactions work: there's a delay between when you press "swap" and when your transaction lands in a block and settles.
Think of it like this. You see ETH/USDC at $2,000. You submit a buy order for 1 ETH. By the time your transaction mines 30 seconds later, the price has moved to $2,020. You got slippage of $20, or 1%. That's slippage.
On low-cap tokens with shallow liquidity, slippage can be brutal. A $10,000 buy of a memecoin might slip 10-15% in seconds because the pool has limited depth. Your $10,000 buy becomes a $10,000 purchase of far fewer tokens than expected. This is why your DEX trades fail or cost way more than you thought.
Every DEX has a slippage tolerance setting. It's your safety net: if the price moves more than your tolerance allows, the transaction reverts and you lose nothing except gas fees. Set it too low and trades fail. Set it too high and you get rekt by MEV bots. Getting this right is critical.
Why Slippage Happens
Slippage isn't random. It's driven by five core mechanics of blockchain and liquidity pools.
1. Liquidity Depth
Automated Market Makers (AMMs) like Uniswap use a simple formula: token_a x token_b = constant. When you trade, you move along the curve. The deeper the liquidity (more tokens in the pool), the less the price moves for the same trade size. A $10,000 USDC->ETH swap on the Uniswap ETH/USDC pool (which has $400M+ TVL) might slip 0.1%. The same $10,000 swap on a new token with $50K liquidity might slip 10-20%.
2. Trade Size vs. Pool Size
Your trade size relative to the pool matters enormously. If the pool has 100,000 tokens and you're buying 1,000 (1% of pool), slippage will be higher than if you're buying 10 (0.01% of pool). A rule of thumb: trades larger than 1-2% of pool liquidity experience visible slippage. Trades larger than 5% experience severe slippage.
3. Price Volatility
Fast-moving markets slip harder. During bull runs or when a token is being pumped, the price moves so fast between block times that by the time your transaction executes, the price has already jumped. Memecoin traders experience this constantly: you submit a buy, the token moons 15% while you wait for block inclusion, your trade reverts because slippage exceeded your tolerance.
4. Block Confirmation Time
Ethereum blocks come every 12 seconds on average. Solana every 400 milliseconds. That gap is an eternity for traders. The longer the block time, the more time for the price to move between submission and execution. This is why Solana traders complain less about slippage than Ethereum traders: faster blocks mean less price movement during execution.
5. Pool Congestion
When everyone rushes the same DEX at the same time, your transaction sits in the mempool longer waiting for block space. During a memecoin launch or market spike, thousands of transactions queue for the same Uniswap pool. Your 30-second wait becomes a 2-minute wait. Prices move while you wait. That's more slippage.
Slippage vs Price Impact: What's the Difference?
These terms get confused constantly. They're related but different.
Price Impact is how much your trade moves the pool price due to its size. If you buy 100 ETH and the ETH/USDC pool moves from $2,000 to $2,005 because of your order, you caused a $5 price impact. Price impact is deterministic: it depends purely on your trade size relative to the pool. DEXs calculate it before you execute and show it in the UI as "price impact" or "market impact."
Slippage is what happens after. Between when you submit that order and when it lands in a block, OTHER people's trades move the price. You expected $2,000 but got $2,010 because 50 other traders bought ETH while you waited. That extra $10 is slippage, not price impact. You caused the price impact. Other people caused the slippage.
In practice, they compound. Your $2,000 limit order experiences both: price impact from your size + slippage from market movement. Many DEX UIs bundle them together as "minimum received" or show them separately. Check your DEX UI documentation to see how it breaks them down.
The key takeaway: you can't control slippage (it's the market), but you can set your tolerance to revert if it exceeds acceptable limits. You can't avoid price impact (it's from your trade size), but you can reduce it by trading smaller amounts or splitting orders across pools.
How to Set Slippage on Major DEXs
Each DEX has a different UI. Here's exactly where to find and adjust slippage tolerance on the major platforms.
Uniswap (Ethereum, Optimism, Arbitrum, Polygon)
Uniswap's interface is consistent across chains. Here's how to set slippage:
- Open the swap page at app.uniswap.org and connect your wallet.
- Find the settings gear icon in the top-right corner of the swap box (it's small and easy to miss).
- Click it to open "Transaction Settings."
- Adjust "Slippage tolerance" to your target. Default is 0.5%.
- Set "Transaction deadline" (default 30 minutes). This is how long the transaction is valid. Leave it as default unless on congested networks.
- Confirm settings and execute your swap.
When to increase Uniswap slippage: 0.5% works for most blue-chip pairs. Increase to 1-2% for lower-liquidity altcoins. On layer 2s (Optimism, Arbitrum), liquidity is thinner, so 1-2% is safer than 0.5%.
Jupiter (Solana)
Jupiter is Solana's largest DEX aggregator. It has automatic and manual slippage modes.
- Open Jupiter at jup.ag and connect your Solana wallet.
- Input your trade (from/to tokens and amount).
- Look for the settings icon (gear) next to "Routes" near the swap box.
- Toggle "Auto Slippage" mode on/off:
- Auto (default): Jupiter dynamically adjusts slippage based on volatility. Safest for new traders.
- Manual: You set a fixed percentage (0.1%, 0.5%, 1%, 2%, 5%, custom).
- If manual, select your tolerance and confirm.
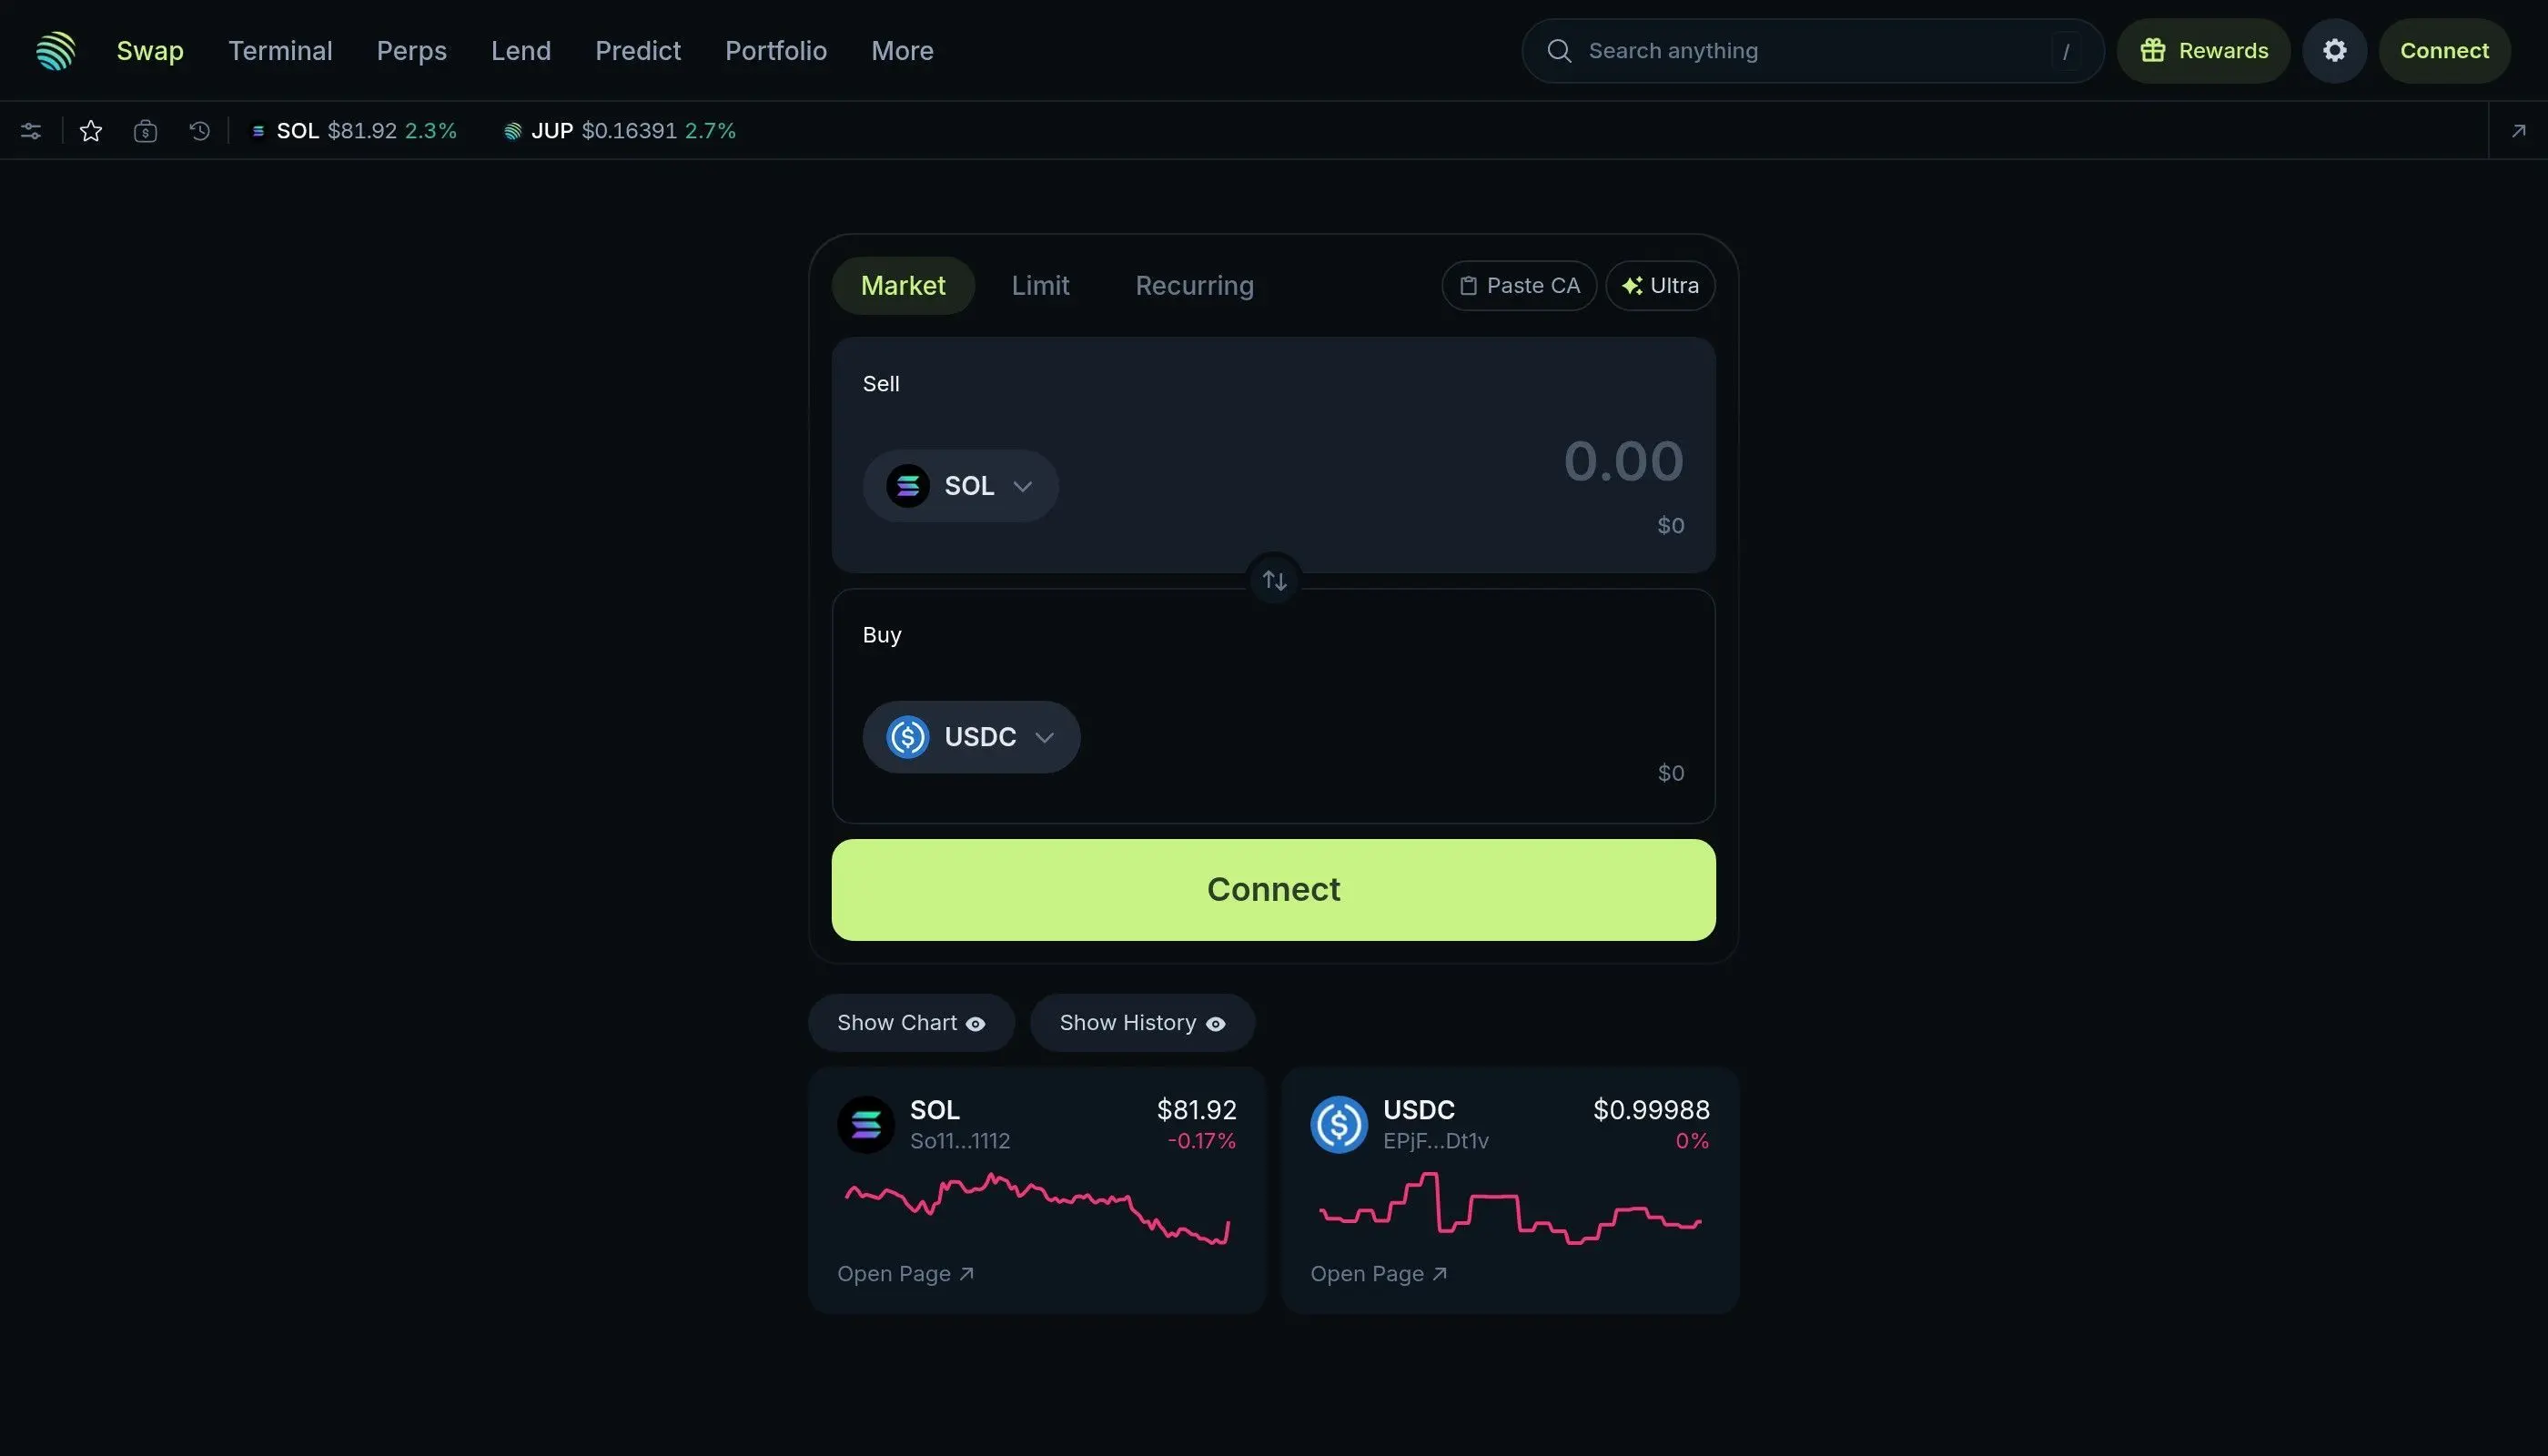
Jupiter pro tip: Auto slippage is smart for most traders because Solana's fast blocks make precise slippage prediction difficult. Use manual mode only if you're trading stable pairs or know the market is calm.
Raydium (Solana)
Raydium is another Solana DEX with a different UI.
- Go to raydium.io/swap and connect your wallet.
- Input your trade details (from/to tokens and amount).
- Find the slippage setting below the swap form. It's usually displayed as a percentage box or dropdown.
- Click the percentage to see preset options (0.1%, 0.5%, 1%, 2%, 5%, custom).
- Select your tolerance or enter a custom value.
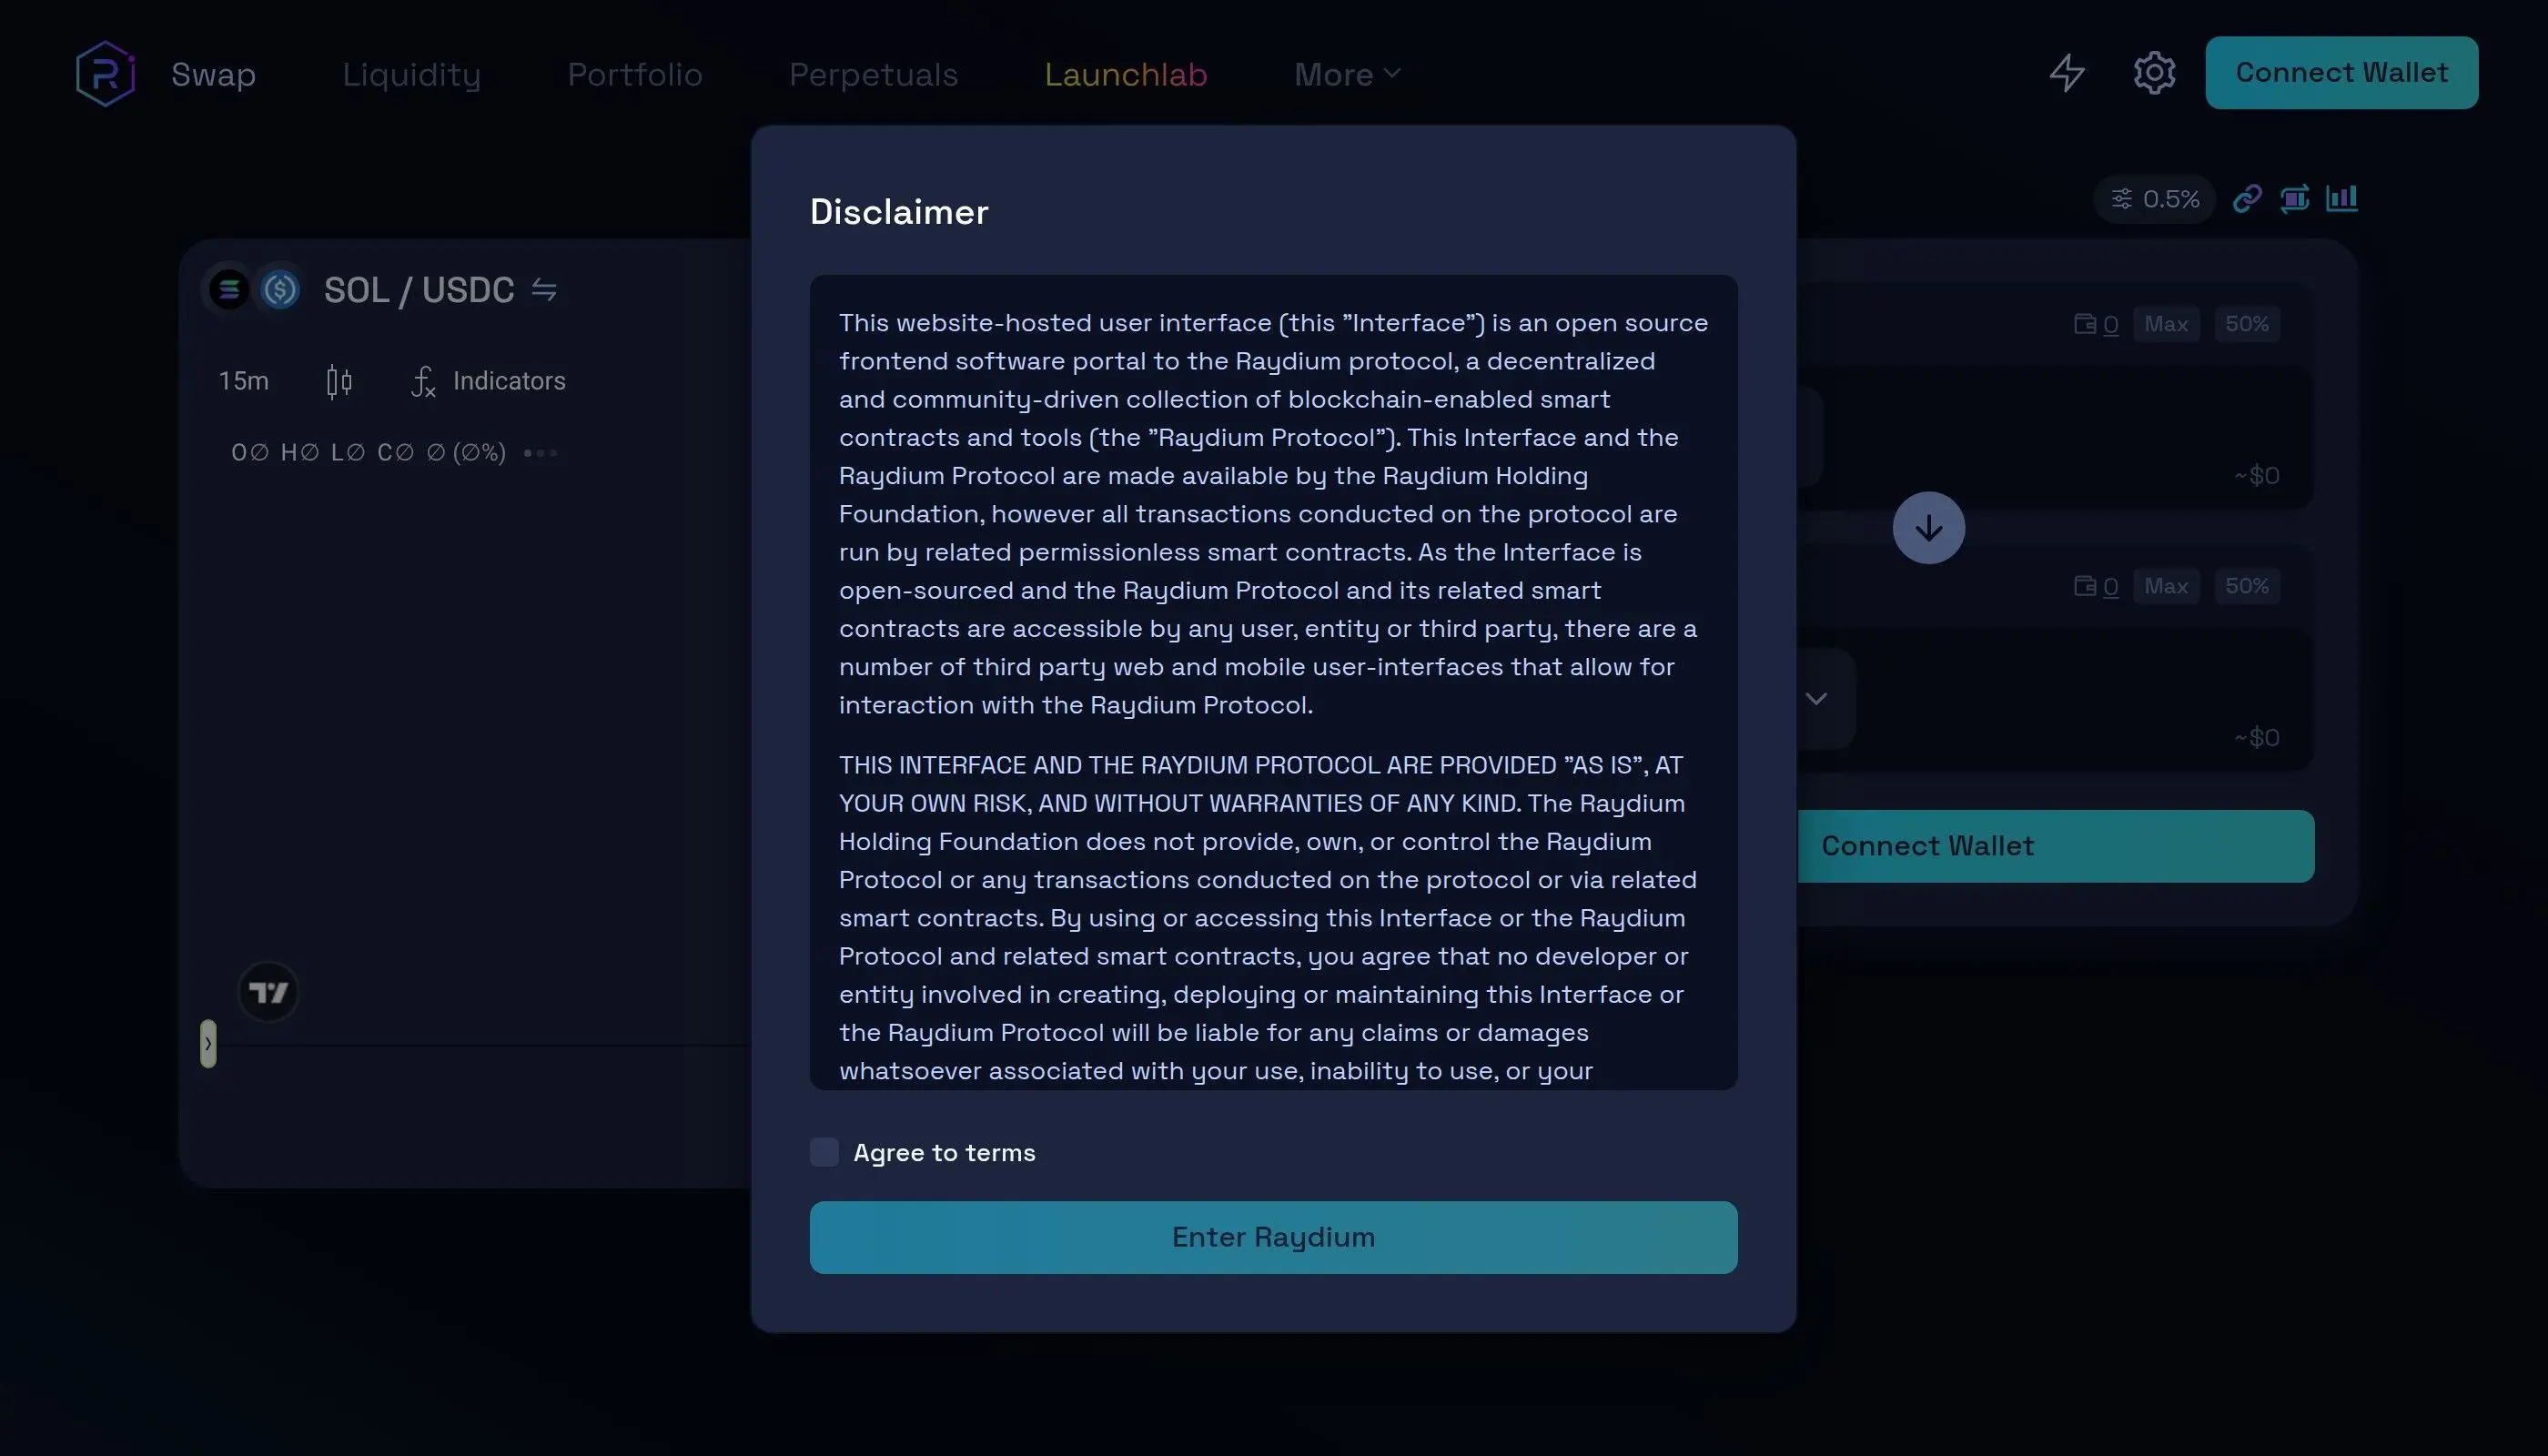
Raydium vs Jupiter: Raydium has no auto mode, so you must set slippage manually. Start conservative (0.5%) and only increase if trades revert.
PancakeSwap (BNB Chain, Ethereum, Polygon)
PancakeSwap is the largest DEX on BNB Chain. Its slippage UI is similar to Uniswap.
- Go to pancakeswap.finance and connect your wallet (choose your chain: BSC, Ethereum, Polygon, etc.).
- Go to the Trade tab and input your swap.
- Click the settings gear icon (right side of the swap box).
- Adjust "Slippage Tolerance" (default 0.5%).
- Check "Expert Mode" if you want extra controls like custom deadlines.
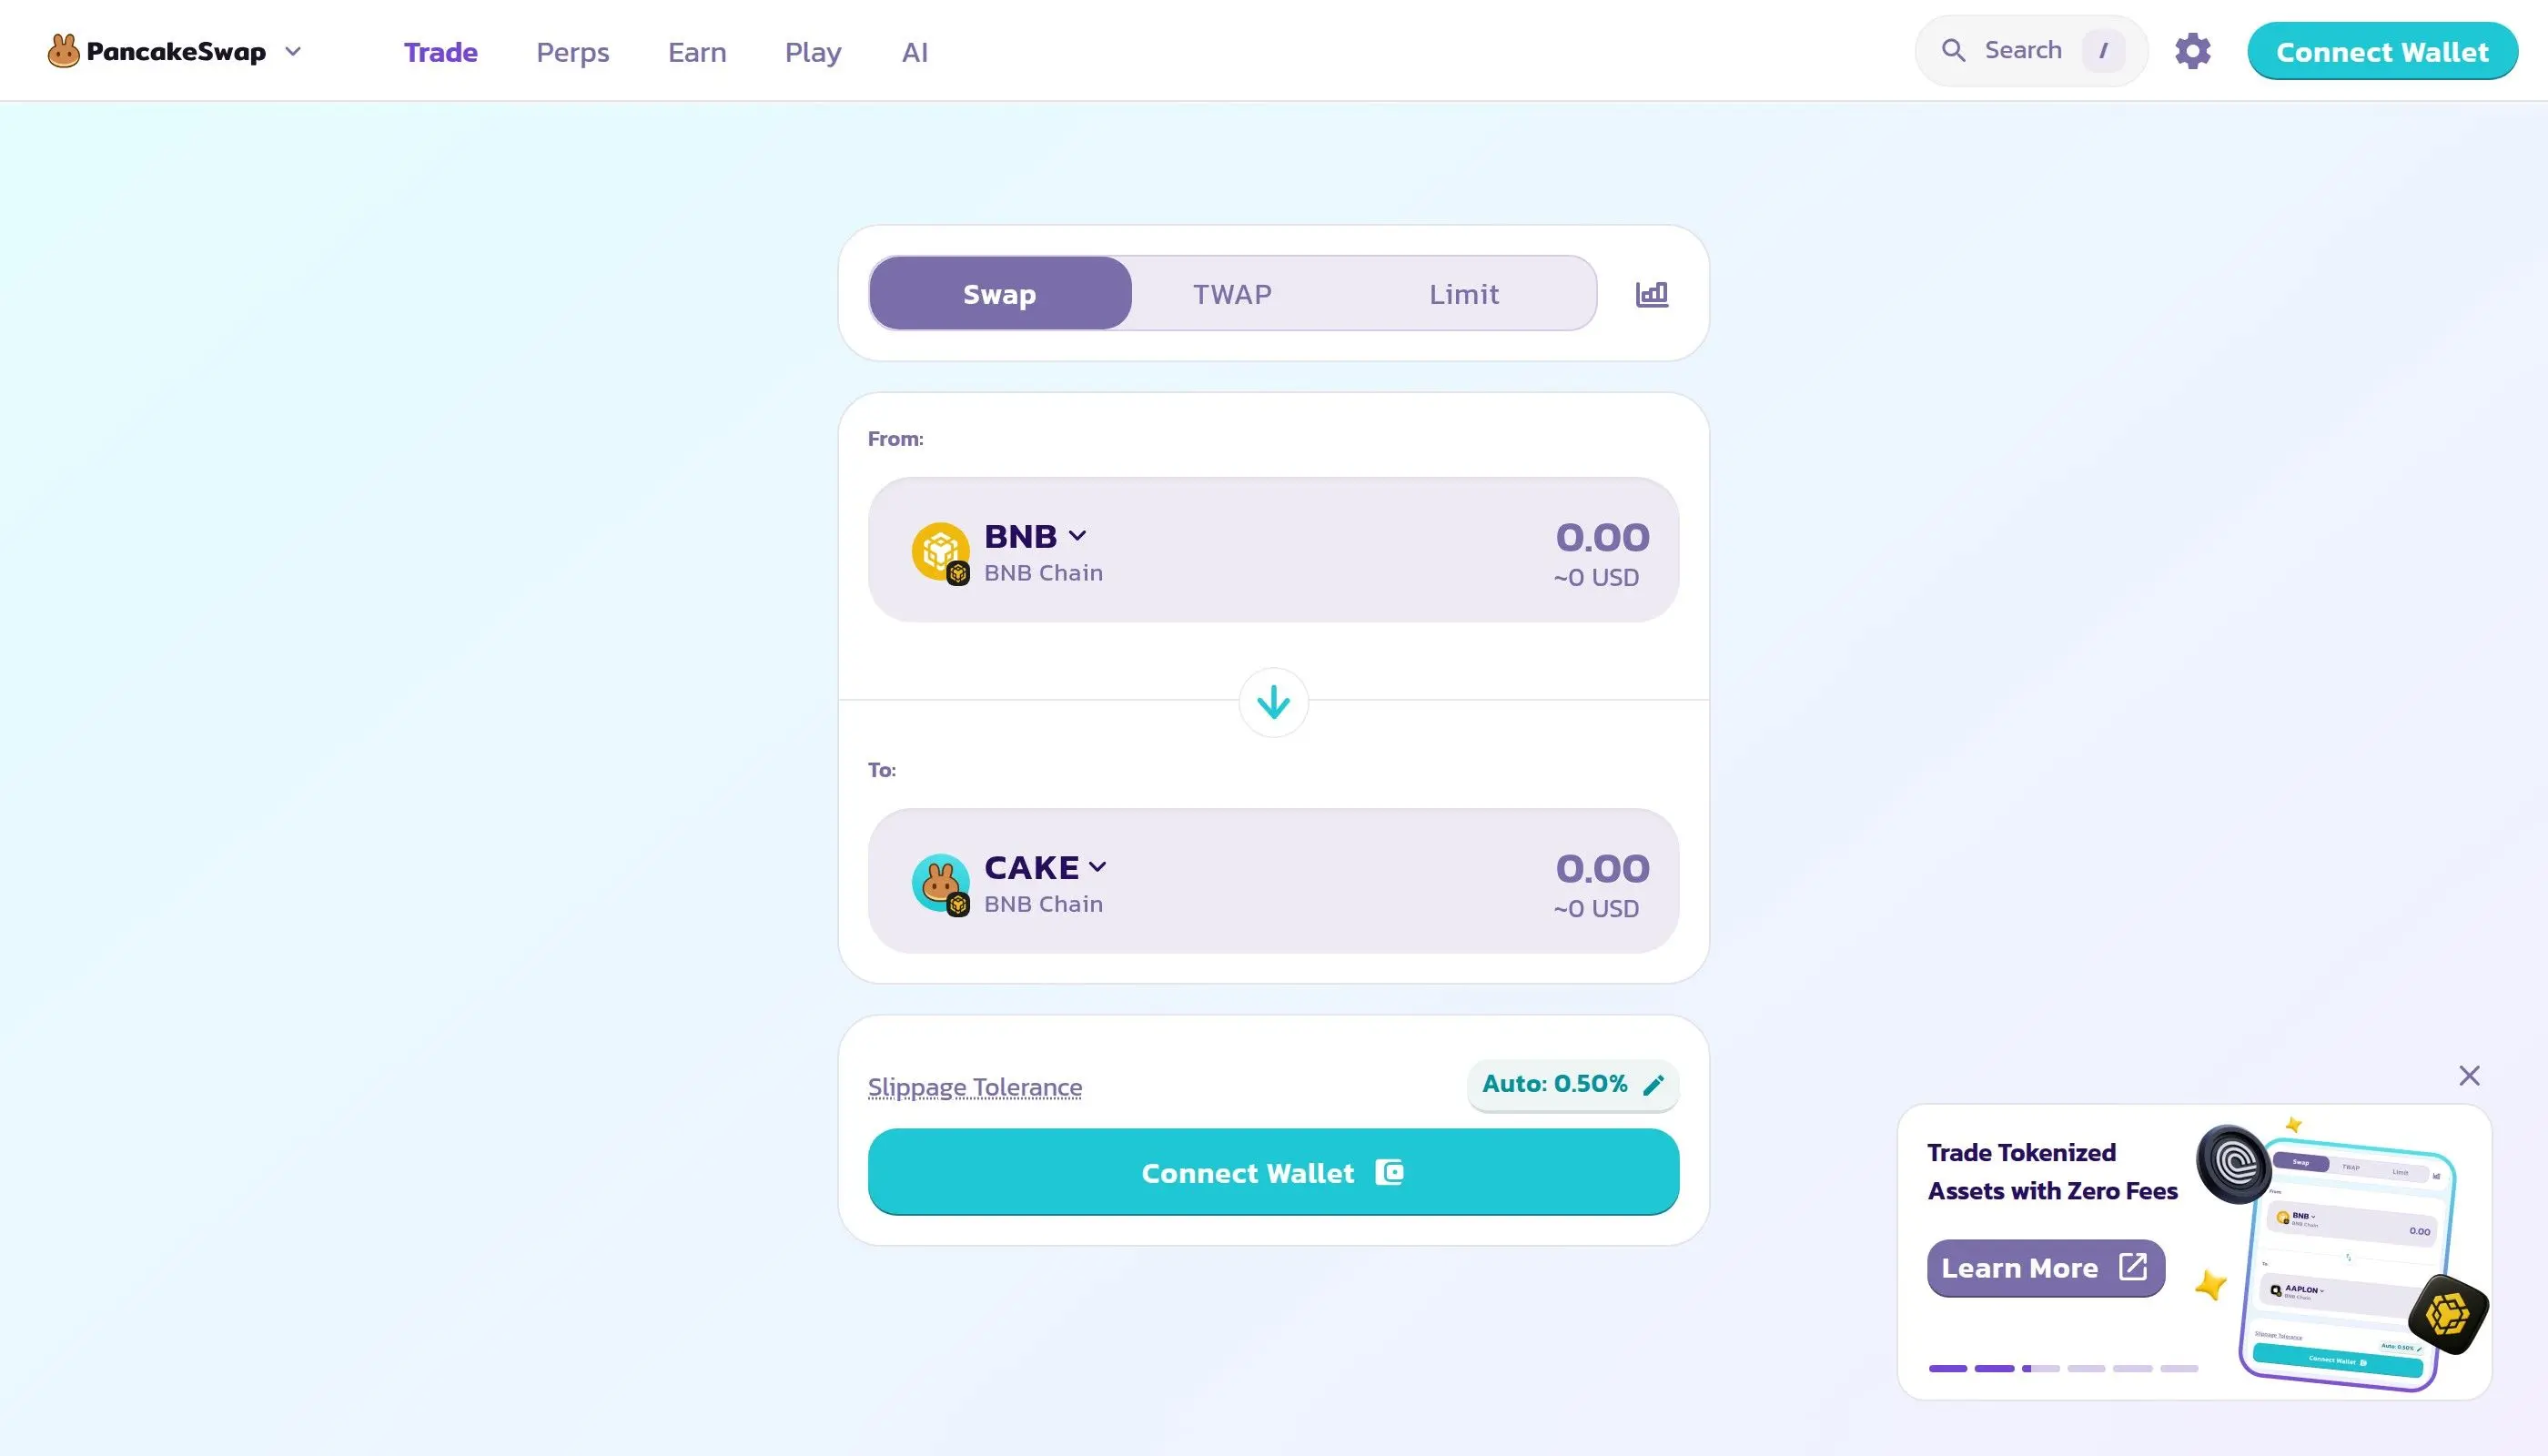
BNB Chain specifics: Because BSC has more block space and faster confirmation than Ethereum, you can often use lower slippage (0.3-0.5%) even for smaller tokens. However, be cautious with tokens that have high buy/sell taxes (see the tax section below).
Recommended Slippage Settings by Token Type
Here's a table for quick reference. These are starting points-always adjust based on current liquidity and volatility.
How to check liquidity: Go to DEXTools.io, search for your token, and check the pool sizes in the "Liquidity" or "Pairs" section. Or use a scanner like Etherscan or Solscan to see the pool's token balances directly.
When Your Transaction Fails: "Transaction Reverted"
You submit a swap and see "Transaction reverted" or "Insufficient output amount." This almost always means your slippage tolerance was too low. The price moved more than you allowed, the DEX didn't accept the terms, and your trade was rejected. Your wallet loses gas fees but no tokens.
How to fix it:
- Increase slippage by 1-2% and try again. If you set 1%, bump it to 2-3%. If you set 5%, bump it to 7%.
- Reduce trade size by 20-30%. Smaller trades slip less. If you're buying $10,000, try $7,500 instead. You can split the order across multiple trades.
- Wait for lower volatility. If a token just pumped 20% in 2 minutes, wait 5-10 minutes for the market to calm. Resubmit then.
- Check for hidden taxes. Some tokens have buy/sell taxes the DEX UI doesn't show. Use a tool like Honeypot Checker to scan the contract. If it has a 10% buy tax, you need at least 11% slippage just to break even.
- Verify liquidity exists. If the pool has been emptied or the token is dead, no slippage setting will help. Check the pool balance on Etherscan or Solscan.
If none of these work, the token may be a scam or the pool may be locked. Walk away.
MEV and Sandwich Attacks: How Bots Exploit Slippage
High slippage is like painting a target on your back for MEV (Maximum Extractable Value) bots.
Here's how the attack works. You submit a buy order for a memecoin with 10% slippage tolerance. A MEV bot sees your pending transaction in the mempool. It:
- Front-runs you: Bot submits its own buy order with higher gas fee, placing it BEFORE your transaction in the next block. The bot buys the token at the current price.
- Your transaction executes: You buy at a higher price (because the bot's purchase just moved the pool).
- Bot back-runs you: Bot immediately sells its tokens at the inflated price to you. Profit extracted.
This is a "sandwich attack." The bot profits $500, you lose $500, the DEX infrastructure gains nothing. MEV bots extract $500 million+ annually from retail traders this way. Higher slippage = bigger profit for the bot = stronger incentive to attack.
How to protect yourself:
- Set slippage as LOW as possible. Use 0.5% for blue chips, 1-2% for alts, only go above 5% if absolutely necessary. Low slippage = low MEV profit = bots ignore your trade.
- Use MEV-protection services:
- Flashbots Protect RPC (Ethereum): Routes your transaction through a private RPC that hides it from MEV bots. Free. Use rpc.flashbots.net
- Jito MEV Bundles (Solana): Bundles your transaction with others and extracts MEV for yourself instead of bots.
- MEV-resistant DEXs: Services like CoW Swap (Ethereum) use batch auctions to eliminate sandwich attacks entirely. No MEV profit available, so bots don't care.
- Use private RPCs: Services like Alchemy, Infura, or Ankr offer private endpoints that don't broadcast to the public mempool. Bots can't see your transaction before it's in a block.
- Split large orders. Instead of one $50,000 buy, do five $10,000 buys across 5 minutes. Smaller orders extract less MEV individually.
- Trade during low-volatility hours. 3-6am UTC, weekend mornings. Fewer bots active, less competitive MEV extraction.
The hard truth: if you set slippage above 5%, you're probably getting sandwiched. Bots are faster than humans. The only real defense is keeping slippage low and using MEV-protection tools.
High vs Low Slippage: Pros and Cons
Low Slippage (0.1-1%)
Pro: Minimizes price deviation. You get close to your expected price.
Pro: Deters MEV bots. Low profit = low incentive to attack.
Pro: Smaller gas waste on failed transactions.
Con: Trades may fail on volatile tokens or during congestion.
Con: Requires more precise market timing.
High Slippage (5-15%+)
Pro: Trades almost always execute. Good for illiquid tokens.
Pro: No need to time the market. Set and forget.
Pro: Works during extreme volatility.
Con: Major price slippage. A $10,000 buy might slip $1,000.
Con: MEV bots actively sandwich these trades. You pay the price.
The optimal strategy: Use the lowest slippage that lets your trade execute. For blue chips, that's 0.5%. For small-caps, 2-3%. For memecoins, 5-10%. Only go higher if trades revert repeatedly and you've already checked for hidden taxes.
Advanced: Tax Tokens and Hidden Slippage
Some tokens charge a buy tax, sell tax, or both. These are built into the contract and are NOT the same as DEX slippage. But they feel the same to traders.
Example: A token charges 5% buy tax and 5% sell tax. You set 1% slippage on the DEX. When you buy:
- You send 1 ETH ($2,000).
- The DEX takes 0.5% of the output (slippage) = token_b x 0.995
- The token contract takes 5% of the input (tax) = token_b x 0.95
- You receive: token_b x 0.995 x 0.95 = token_b x 0.945 (loss of ~5.5%)
The 5% tax is hidden in the contract, not shown in the DEX UI. Traders set 1% slippage, expect to lose 1%, but actually lose 6%. Transactions "fail" because the actual output is so far below what the DEX expected.
How to detect hidden taxes:
- Go to honeypotchecking.com or rugcheck.xyz and paste the token contract address.
- Look for "Buy Tax" and "Sell Tax" fields. If either is above 0%, the token has a tax.
- Add the tax % to your slippage tolerance. Example: 5% buy tax + 1% slippage = set DEX to 6% minimum.
Pro tip: Avoid tokens with buy taxes above 3% unless you have a specific reason to hold them. They're designed to trap liquidity and often turn into scams.
Frequently Asked Questions
What is a good slippage tolerance?
It depends entirely on the token and market conditions. Blue-chip tokens (ETH, BTC, SOL) are safe at 0.1-0.5%. Mid-cap tokens with $10M+ liquidity need 0.5-1%. Small-cap tokens need 1-3%. Memecoins and new launches often need 5-15%. Always check the token's liquidity first. When in doubt, start at 1% and adjust upward if trades fail.
Why does my transaction keep reverting?
The most common reason is slippage set too low. Your DEX submitted a trade, but the price moved more than your tolerance allowed before it executed, so the transaction reverted. Try increasing slippage by 1-2%. If that doesn't work, reduce your trade size (smaller orders slip less), wait for a calmer market, or check if the token has hidden buy/sell taxes using honeypotchecking.com. If it still fails, the token may be a scam or the pool may be empty.
Is high slippage always bad?
Not entirely. High slippage is necessary for illiquid tokens to avoid transaction failures. But it's a trade-off: higher slippage means less price certainty and higher risk of MEV sandwich attacks. The key is finding the minimum slippage you need for your trade to execute reliably, not setting it arbitrarily high "just in case." For liquid tokens, always keep slippage below 1%.
What's the difference between slippage and price impact?
Slippage is the price change between when you submit your transaction and when it executes in a block. It's caused by other traders moving the market while you wait. Price impact is how much YOUR trade moves the pool price due to its size. You cause the price impact; other traders cause your slippage. They compound together, but DEX UIs often show them separately or bundled as "minimum received."
How do MEV bots exploit slippage?
MEV bots front-run your buy by inserting their transaction before yours, then back-run your trade by selling their tokens to you at the inflated price. They profit from the price movement between their buy and sell. High slippage tolerance makes this attack very profitable, so bots specifically target traders with slippage above 5%. Protect yourself by setting slippage as low as possible (0.5-1% for safe trades), using Flashbots Protect RPC or similar MEV-protection services, and never setting slippage above 5% unless you absolutely have to.
Related Articles
- How to Snipe New Token Launches: DEXTools Tutorial (2026)
- How to Use BubbleMaps to Detect Token Manipulation: Tutorial (2026)
- How to Buy Memecoins on Solana
- How to DYOR: Crypto Token Research Tutorial & Guide
- Fix Insufficient Liquidity for This Trade
Conclusion
Slippage is a fundamental part of DEX trading. It's not going away. But understanding what it is, why it happens, and how to set it right transforms you from a trader who blames "DEX bugs" to one who takes control of execution.
Remember: slippage tolerance is a safety mechanism. Set it too low and you lose gas on failed transactions. Set it too high and you lose money to MEV bots. The sweet spot is the minimum slippage you need for your specific token and market condition.
For blue chips, that's 0.1-0.5%. For alts, 0.5-2%. For small-caps and memecoins, 2-5%. And always check for hidden taxes before you trade.
Master slippage, and you'll stop watching $10,000 trades fail for stupid reasons. That's a win.
Keep Learning