How to Verify a Token Contract Before Trading (2026)
— By Tony Rabbit in Tutorials

Learn how to verify a token contract before trading in 2026 with explorer checks, GoPlus, RugCheck, Bubblemaps, simulation, and revoke.cash hygiene.
Verifying a token contract before you trade is the single highest leverage safety habit in crypto. A token name is a label, a chart is a picture, and a Telegram message is just words on a screen. The only thing that defines what you actually buy is the on chain contract address. In 2026, with DEX activity scattered across Ethereum, Base, Arbitrum, BNB Smart Chain, Solana, Sui, and dozens of L2 rollups, the surface area for fake tokens, honeypots, and copycat scams has never been larger.
This guide walks you through a complete verification framework for both EVM chains and Solana. You will learn where to source a contract address you can trust, how to read explorers like Etherscan and Solscan, how to interpret token functions and authorities, which automated scanners to run (GoPlus, De.Fi, TokenSniffer, RugCheck, SOLsniffer), how to inspect holder distribution with Bubblemaps, how to simulate a transaction with Tenderly, and how to clean up dangerous approvals afterwards with revoke.cash.
By the end you will have a repeatable five minute routine that filters out the vast majority of scams, plus a clear decision rubric for when to proceed, wait, or walk away.
What Token Contract Verification Actually Means
Token contract verification is the process of confirming that a smart contract address corresponds to the asset you intend to trade, that the deployed bytecode matches publicly readable source code, and that the contract does not contain hidden functions or authorities that would let an operator steal funds, freeze your balance, or block you from selling. It combines identity verification (is this the right token), authenticity verification (is the source code published and matching the bytecode), and behavioural verification (what can this contract actually do once you interact with it).
In practice, verification has three pillars. The first pillar is sourcing the address from a trustworthy origin, never from a random chat message. The second pillar is using the block explorer to confirm the source is verified, the deployer is reasonable, and the function set is benign. The third pillar is layering automated scanners, holder analysis, and transaction simulation on top to catch the things humans miss. Skip any of the three and you are gambling.
To verify a token contract before trading: (1) get the address from the official project site or a verified aggregator like CoinGecko, (2) open it on the relevant chain explorer and confirm the source code is verified, (3) run automated checks on GoPlus, De.Fi, TokenSniffer, or RugCheck, (4) review holder distribution on Bubblemaps, (5) check liquidity lock and ownership, (6) simulate the buy with Tenderly, and (7) revoke approvals afterwards using revoke.cash.
Why Verify a Token Contract at All
Independent on chain security reports consistently estimate that the majority of newly deployed tokens on permissionless DEX environments are either outright honeypots, copycat scams, or low effort meme launches with malicious code. Losses from rug pulls run into hundreds of millions every year, and the median victim is a retail trader who clicked a trending link without checking the contract.
The most common patterns: fake tokens reusing the exact name and symbol of a legitimate project, often on a different chain or with a single character difference in the address; honeypots that let you buy but quietly block you from selling through a hidden blacklist or a transfer fee silently set to 100%; mint exploits that let the deployer create unlimited supply and dump; proxy upgrade traps that swap a clean implementation for a malicious one a week later. Each has a verification step that catches it.
Verification also defends against social engineering. A friend forwarding a Telegram message, a sponsored tweet, a Discord pin, or a Google ad can all point to the wrong address. Address poisoning attacks deliberately seed your transaction history with lookalike addresses so the next paste copies the attacker. Our companion guide on address poisoning scams covers the same vigilance applied to wallet addresses.
Step 1: Find the Contract Address From a Trustworthy Source
The address must come from a source you can defend. The trust hierarchy, from most reliable to least: the project's official website (HTTPS, domain matches the brand), a verified profile on CoinGecko or CoinMarketCap, the project's verified Twitter or X handle, the project's documentation portal, and as a last resort, a community link aggregator. Telegram forwards, Discord DMs, paid ads, screenshots, and OCR should never be treated as authoritative.
CoinGecko and CoinMarketCap list a token's contract addresses across every chain it has been deployed on, with a copy button that gives the exact string. A claimed page is meaningful third party confirmation. Always double check the chain dropdown matches your target chain, because cross chain confusion is one of the most common entry points for losses.
Verify the domain is the real one (compare across multiple search engines, avoid sponsored results). Look for a contracts page in the docs.
Claimed token pages with verified team. Confirm the chain selector matches your target chain before copying.
Cross check the address pinned on the verified Twitter or X account against the website. Copycat handles are extremely common.
Telegram forwards, Discord DMs, sponsored search results, screenshots, and OCR are never authoritative. Always confirm against tier 1 or 2.
One nuance: search engines are not a safe entry point in 2026. Sponsored ads for popular token names regularly point to phishing sites that mirror the real project but ship the wrong contract. Type the URL you already know, or click a verified link from CoinGecko.
Step 2: Verify the Address on an EVM Chain Explorer
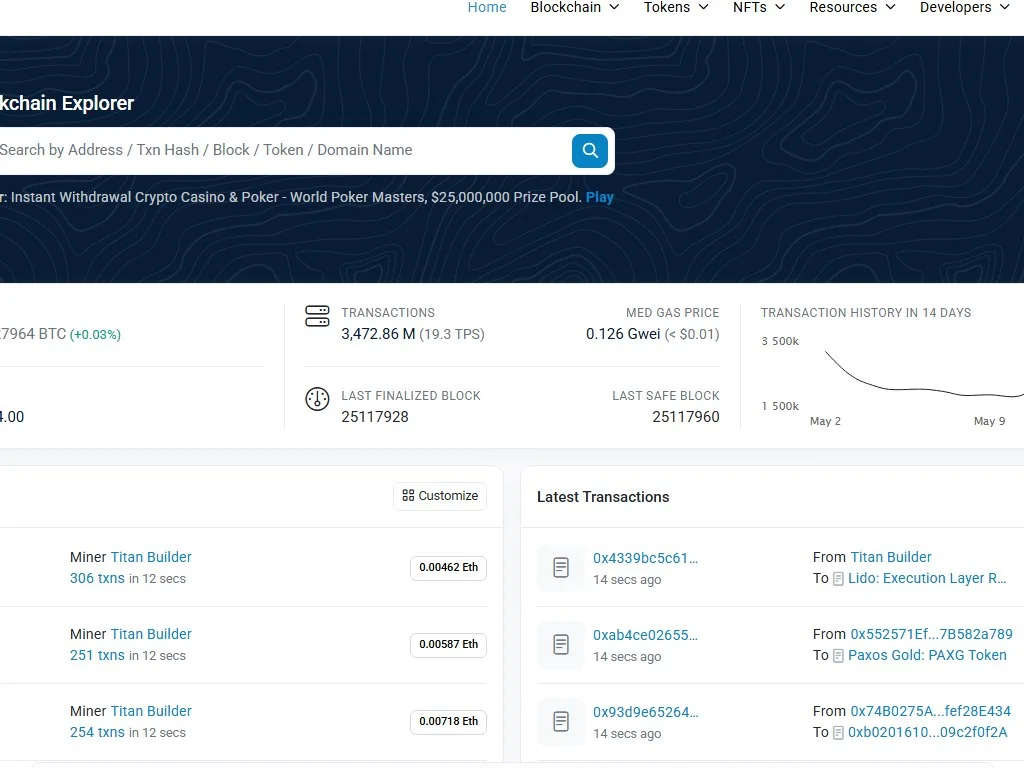
Open the address in the right block explorer: Etherscan for Ethereum, Basescan for Base, Arbiscan for Arbitrum, BscScan for BNB Smart Chain, PolygonScan for Polygon, Snowtrace for Avalanche. They share the Etherscan codebase, so the interface is consistent. Paste the address into the search bar and the page loads the contract overview.
Three sections matter most. First, the heading: does the explorer recognise this as a token contract, and does the symbol match what you expect? Second, the Contract tab. Look for the green checkmark next to "Contract Source Code Verified". That badge means the public Solidity matches the deployed bytecode, a cryptographic guarantee, not a trust statement. If it is missing, the contract is opaque and your suspicion bar should rise immediately.
Third, the Read Contract and Write Contract sections. Read Contract exposes view functions like owner() and totalSupply(). Write Contract lists every state changing function, where dangerous capabilities like minting, blacklisting, and tax setting appear.
Functions That Should Trigger a Red Flag
A clean fixed supply ERC 20 has roughly ten functions: transfers, allowances, approvals, balance queries, and constants. Anything beyond that needs to be understood. The names below are the most common red flags. Some legitimate tokens (governance, rebasing, RWAs) need elevated controls, but each is a capability you should consciously accept before trading.
mint() or _mint() with onlyOwnerblacklist(), setBlacklist(), isBlocked()pause() / unpause()setTax(), setFee(), setSellTax()setMaxTx(), setMaxWallet()Reading Ownership
Inside Read Contract, call owner(). Four categories. If the answer is 0x0000000000000000000000000000000000000000, ownership is renounced and no owner only function can ever be called again. Safest config for fixed supply tokens. If the answer is a Safe multisig, click into the address and see how many signers are required, a strong governance signal.
If the answer is a timelock contract, owner only calls wait a predefined delay before executing, giving the community time to react. Good sign. If it is a plain EOA (externally owned account), that single key holder can call every owner only function instantly. For a token with mint, blacklist, or setTax capabilities, an EOA owner is a "trust me bro" configuration, and your verification should reflect that risk.
Also look at deployer history. Click the deployer address on the contract overview, open its transactions, and see what else it has launched. A deployer that has shipped twelve other tokens that all collapsed within hours is telling you everything.
Step 3: Verifying a Token on Solana
Solana does not expose Etherscan style source verification, but it has its own verification surface that is arguably richer for tokens. The main explorers are Solscan, Solana Explorer, and SolanaFM. For an SPL token, paste the mint address into Solscan and inspect the Token Info panel.
Two fields are critical: mint authority and freeze authority. The mint authority is the public key that can create new tokens. If set to a wallet, that wallet can inflate supply indefinitely. If "None" or null (revoked), supply is permanently capped, the equivalent of EVM ownership renouncement. The freeze authority can freeze any token account for this mint, blocking specific holders. For a fair meme launch, both should be null. For a regulated stablecoin like USDC, both are intentionally retained because the operator is a known regulated entity.
Also confirm token metadata: name, symbol, URI to JSON metadata, and image. Fake Solana tokens often reuse a popular project's name and symbol but point to a metadata URI on an unrelated domain, so a quick click through is a meaningful sanity check.
Step 4: Run Automated Security Scanners
Human inspection catches obvious red flags. Scanners catch the subtle ones. In 2026 a mature ecosystem of free tools aggregates dozens of heuristics into a single security score, and running more than one is the smart move because each catches different patterns.
Free token security API and web UI covering EVM chains plus Solana. Flags honeypots, owner privileges, tax mutability, blacklist functions, and proxy upgradeability in one view.
Multi chain scanner that ranks tokens and wallets, surfaces dangerous approvals, and highlights known exploit signatures. Especially strong for ranking risk before granting allowance.
EVM focused. Performs a simulated buy and sell to detect honeypot behaviour and contract code similarity scoring against known scams.
Solana focused. Surfaces mint and freeze authority, LP burn or lock status, and holder concentration in a clean score from Good to Danger.
Complementary Solana scanner with a different rule set. Cross checking with RugCheck reduces false negatives on freshly deployed mints.
Single purpose simulator that fires a fork buy and sell on EVM chains and reports the realised tax and whether the sell succeeded.
How to Read a Scanner Score Correctly
Scanners are essential but not infallible. Green does not guarantee safety, it means the heuristics did not match a known pattern at scan time. New exploit patterns, proxies not yet upgraded, or honeypots that only trigger above a volume threshold can all slip past. Treat the score as a strong filter, not a verdict.
Practical rule: any single red or amber is enough to pause and investigate. Multiple greens across two scanners, plus clean manual inspection, plus a successful simulated transaction, is what counts as "verified" in 2026. If one scanner is green and another flags ownership risk, the tie breaker is your own reading of the contract.
Step 5: Holder Distribution and Bubblemaps
Even if the contract is technically clean, a token where one wallet holds 60% of supply is one transaction away from collapse. Holder concentration is one of the most predictive signals for price stability in the first weeks after launch. The block explorer's Holders tab lists the top wallets, but it does not tell you which ones are connected to each other. Bubblemaps fills that gap.
Bubblemaps visualises holder clusters as connected bubbles, where the line thickness represents the volume of token transfers between addresses. A clean distribution looks like dozens of small disconnected bubbles. A cluster of large bubbles all linked back to a single funding wallet is a sniper bundle, a presale concentration, or a team holding spread across burner wallets. Reading the cluster graph is one of the fastest ways to see the true ownership picture rather than the explorer's nominal one. If you want a deeper walkthrough, our tutorial on burner wallets for airdrops and meme coins covers how launch snipers typically structure their wallets.
Practical thresholds: top 10 holders combined should ideally be under 30% of circulating supply for a community token. Above 50% is a serious concentration risk. Anything above 70% means a handful of wallets can dictate price. If LP and known burn or vesting contracts are excluded from the calculation, the picture often improves, but unknown clusters above 20% are still a serious signal.
Step 6: Liquidity Pool Verification
Contract verification is incomplete without liquidity verification. A pristine token contract with no liquidity, or with liquidity that the deployer can remove at will, is functionally a rug pull waiting to happen. The two questions to answer are: how much liquidity exists, and who controls it.
For EVM tokens, the LP tokens of the main trading pair (usually paired with WETH, USDC, or USDT) are themselves ERC 20 tokens. If the deployer sent them to the burn address 0x000...dead, liquidity is permanently locked. If they were sent to a recognised locker like Unicrypt, Team.Finance, or PinkLock, you can click into the locker contract and read the unlock timestamp. Anything less than six months is short term, anything less than one month should be treated as "about to be pulled". If the LP tokens are still held by the deployer wallet, the deployer can withdraw all liquidity at any moment. That is a hard stop.
On Solana, the equivalent check is whether the LP position has been burned (transferred to a null address) or locked. For Raydium pools, check the LP token mint and confirm a burn transaction. For Meteora and Orca whirlpool style pools, the position NFT representing the liquidity range can be burned or locked similarly. A full walkthrough of pool inspection lives in our companion guide on transaction simulation in crypto, which pairs naturally with this section.
- LP tokens are burned or locked with a reputable locker.
- Unlock date, if any, is at least 6 months in the future for a long term position.
- Total liquidity is meaningful relative to market cap (a 50k market cap with 1k liquidity is dangerous).
- Pair currency is a real asset (WETH, USDC, USDT, SOL, not a paired token controlled by the same team).
Step 7: Simulate the Transaction Before You Sign
Transaction simulation is the verification step that the 2024 generation of traders skipped and the 2026 generation cannot afford to. Simulation runs your intended transaction against a forked copy of the chain state and shows you exactly what would happen: which tokens leave your wallet, which arrive, which approvals are granted, and whether the call reverts. Crucially, it does this without signing the real transaction or paying gas.
The most powerful tool in this category is Tenderly, which lets you simulate any transaction on any major EVM chain through a clean web UI. You paste in the transaction data (or build it visually), click simulate, and Tenderly returns the full state diff, event log, and call trace. For traders, the simpler workflow is to use a wallet that performs simulation automatically. Rabby Wallet and the latest versions of MetaMask both show a transaction preview that highlights expected token movements and warns on unusual approvals.
For Solana, simulation is built into the protocol via simulateTransaction RPC calls, and modern wallets like Phantom and Backpack show a pre signing preview that includes net SOL change, SPL token changes, and any NFT transfers. If the preview shows you sending more than you expect, or receiving less, or granting an open ended delegation, abort.
The single most valuable thing simulation catches is the difference between expected and actual behaviour. A honeypot will often simulate the buy successfully but fail the sell. A malicious approval will look like a small swap in the front end but request unlimited allowance in the actual call data. A drainer site will show one token in the UI but build a transaction that moves a completely different one. Simulation surfaces all of this before you sign.
Step 8: Post Trade Hygiene With revoke.cash
Verification does not stop at the buy. Every time you trade a new token through a DEX router, your wallet grants an allowance, and many DEX frontends still default to unlimited approval. Over months, an active trader can accumulate dozens of unlimited approvals to routers and contracts they no longer use. If any of those contracts is later exploited, all the tokens you have approved are exposed. The fix is revoke.cash, a free interface that lists every active approval per wallet and lets you revoke them in a click.
Two routines are worth building. After every session of buying new tokens, open revoke.cash, scan your wallet across the chains you used, and revoke any approval to a contract you do not actively need. The second is a monthly clean up where you revoke everything older than a certain threshold, especially unlimited approvals to obscure or unverified contracts. The cost is a few dollars in gas, the upside is closing the attack surface that has drained countless wallets after the token interaction was long forgotten.
For deeper background on how approvals work and why Permit2 changed the safety landscape for token permissions, our companion guide is worth reading once. The short version: Permit2 lets you grant time bounded, revocable, signature based allowances that solve many of the historical risks of unlimited approve() calls, but only when the dApp supports it.
Real World Examples: Fake Tokens That Caught Thousands
The recurring pattern across high profile token scams is not technical sophistication, it is social engineering combined with a missing verification step. Fake USDT tokens have appeared on dozens of chains, often using the exact name "Tether USD" and symbol "USDT" but a contract address that has nothing to do with Tether Limited. They are listed on permissionless DEX screeners, sometimes traded with real liquidity for hours, and bought by users who relied on the symbol rather than the address.
Fake versions of major project launches are equally common. Within hours of a real token going live, dozens of copycats appear on the same chain with similar names and decimals. The copycats often pump first because bots and traders looking for early entries pile into the first thing that matches the search term. A few hours later, the deployers pull liquidity and the buyers are left with worthless tokens. The protection is exactly the workflow in this guide: confirm the address against the project's official site, run it through scanners, simulate the buy.
The other recurring pattern is the chain mismatch. A project announces a launch on Base, traders rush in, and bots scrape the announcement post and recreate copycats on Ethereum or BNB. A trader who searches the symbol on a multi chain explorer or screener will see results on multiple chains, often with different liquidity profiles. The wrong chain is bought, the trader thinks they are early, and the real launch on Base passes them by entirely. Always confirm the chain before you confirm the address.
A Repeatable Verification Workflow
Official site, CoinGecko, CoinMarketCap, or verified social. Never from chat messages, screenshots, or paid ads.
Etherscan, Basescan, Arbiscan, BscScan, PolygonScan, Snowtrace, or Solscan. Confirm source verified badge and inspect ownership and write functions.
GoPlus and De.Fi for EVM, RugCheck and SOLsniffer for Solana, TokenSniffer or Honeypot.is for sell tax checks.
Identify clusters, sniper bundles, and team wallets. Apply the 30% rule for top 10 concentration.
LP tokens burned or locked, unlock date acceptable, paired against a real asset.
Tenderly, Rabby, MetaMask preview, or Phantom preview. Confirm expected token flow and reasonable approvals.
Open revoke.cash, scan, and clean up unnecessary approvals across all chains used.
Decision Rubric: Proceed, Wait, Walk Away
With the workflow defined, you need a clear rule for what each outcome means. Without a rubric, traders rationalise their way past warnings. The table below is the rubric I personally apply, refined over hundreds of small position entries across EVM and Solana chains.
Multi Chain Tools Matrix
Different chains expose different surfaces, and the right tool depends on where the token lives. The matrix below maps the verification tasks to the best tool per chain in 2026.
How DEX Screeners and Aggregators Fit In
Live pair pages on DEXTools, DEXScreener, Birdeye, and GeckoTerminal are extremely useful for monitoring price, volume, and liquidity, but they are downstream consumers of the same contract address you are verifying. The most important habit is to start from a verified contract address and click into the pair from there, rather than starting from a trending screener entry and assuming the contract is correct. A trending pair can absolutely be a copycat, especially in the first hours after a real launch.
The right workflow is to verify the contract first using the steps above, then paste the verified address into your favourite screener to monitor live trading. If you want a deeper read on screener choice, our guide on detecting fake volume in crypto charts explains why a high volume bar on a trending pair is not by itself a quality signal. Volume can be wash traded, especially on freshly deployed tokens where the liquidity is shallow enough to make manipulation cheap.
Pros and Cons of Modern Verification Tools
- Free and fast: a complete check takes under five minutes.
- Catches the majority of honeypots and copycat scams.
- Multi chain coverage spans EVM L1s, L2s, and Solana.
- Pre signing simulation eliminates an entire class of drainer attacks.
- Approval revocation keeps a long term attack surface clean.
- Scanners can give false negatives on brand new exploit patterns.
- Proxy upgrades let a contract change behaviour after verification.
- Tooling is fragmented per chain and per token standard.
- Verification fatigue: it is tempting to skip steps under FOMO.
- Some scanners require browser permissions or paid tiers for full data.
Best Practices for Long Term Safety
Treat verification as a process you run on every new token, not just suspicious ones. The habit is what protects you, not the analysis of any single trade. Build the routine into your trading flow so it happens automatically: address, explorer, scanners, holders, LP, simulate, trade, revoke. Five minutes per token, every time.
Use a hot wallet that is separate from your long term storage. A burner wallet for new token interactions limits the blast radius if something goes wrong, and lets you grant fresh approvals without exposing your main holdings. Pair this with a hardware wallet for any high value assets, and read our crypto wallet security tips guide for the broader framework.
Keep your wallet software updated. Recent versions of MetaMask, Rabby, Phantom, and Backpack ship significantly improved transaction previews and warning systems compared to versions from even a year ago. The browser extension itself is part of your verification stack, and an outdated extension is missing recent threat intelligence. Also, learn the basic mechanics of nonce errors in crypto so that a stuck or replaced transaction does not pressure you into hasty decisions.
Diversify your verification sources. Cross checking GoPlus against De.Fi, or RugCheck against SOLsniffer, costs nothing and reduces single tool blind spots. The same logic applies to address sourcing: confirm against both CoinGecko and the official site rather than either one alone. Treat verification as a layered defence, not a single gate.
Frequently Asked Questions
Q Q Q What is the fastest way to verify a token contract before trading?
Copy the address from CoinGecko or the official site, paste it into the relevant block explorer to confirm source code is verified, then run it through GoPlus (EVM) or RugCheck (Solana). If all three agree, simulate the buy in your wallet preview. This takes under three minutes and catches most honeypots.
Q Q Q Where should I get the contract address from?
From the project's official website or a verified CoinGecko or CoinMarketCap page. The verified social handle is an acceptable fallback. Never trust addresses sent in Telegram messages, Discord DMs, sponsored search results, or screenshots, because these are the most common phishing vectors.
Q Q Q What does "source code verified" mean on Etherscan?
It means the project uploaded the original Solidity source code and the Etherscan compiler confirmed that compiling that source produces bytecode identical to what is deployed on chain. It is a cryptographic match, not a trust signal. An unverified contract is opaque and should raise your suspicion bar significantly.
Q Q Q How do I verify a token on Solana?
Open the mint address on Solscan and check that the mint authority and freeze authority are set to None for a community token. Run the address through RugCheck.xyz and SOLsniffer, review holder distribution on Bubblemaps or Birdeye, and confirm the LP position is burned or locked on Raydium, Meteora, or Orca.
Q Q Q What functions in a token contract are dangerous?
Mint, blacklist, pause, setTax, setMaxTx, and any onlyOwner function that controls supply or transfer behaviour. They are not always malicious because some legitimate tokens need them, but each one is a capability you should consciously accept. The safest configuration is renounced ownership with no upgrade path.
Q Q Q What is a honeypot token?
A honeypot is a token contract that allows buys but blocks sells, either through a hidden blacklist, a sell tax set to 100%, or a transfer restriction triggered by a specific condition. Honeypot.is and TokenSniffer simulate buys and sells against the contract and report whether the sell would succeed.
Q Q Q How does Bubblemaps help with verification?
Bubblemaps visualises holder clusters by tracking on chain transfers between addresses. Wallets that share a funding source appear connected, which exposes sniper bundles, presale concentrations, and team holdings spread across burner wallets. A clean distribution looks like many small disconnected bubbles, not a few large connected clusters.
Q Q Q Why should I simulate a transaction before signing?
Because simulation shows the actual effect of the transaction, not what the website claims. A malicious dApp can display a small swap in the UI while building a transaction that drains your wallet or grants unlimited approval to a malicious contract. Tools like Tenderly, Rabby, and Phantom show the real state diff before you sign, catching the discrepancy.
Q Q Q Is revoke.cash safe to use?
Yes. Revoke.cash is an open source frontend that builds standard ERC 20 revoke transactions for you to sign. It never holds your tokens or your keys. The site only reads on chain allowance data and constructs the revoke call, which your wallet then signs and broadcasts. Always confirm the URL is the official one before connecting.
Q Q Q What does a renounced contract mean?
A renounced contract has had its owner set to the zero address (0x0000...0000), meaning no owner only function can ever be called again. This removes the ability to mint, blacklist, pause, or change taxes. Renouncement is generally the safest configuration for fixed supply community tokens, but it also means future upgrades or bug fixes are impossible.
Q Q Q Can a scanner score guarantee a token is safe?
No. A green score means the heuristics did not match a known pattern at scan time, not that the contract is guaranteed safe. New exploit patterns, proxy upgrades, and time delayed traps can all bypass automated checks. Use scanner scores as a strong filter combined with manual inspection, holder analysis, and simulation, not as a single verdict.
Q Q Q What is the safest holder concentration threshold?
For community tokens, the top 10 holders combined should be under 30% of circulating supply, excluding burn addresses and known locked LP. 30 to 50% is moderate concentration risk and warrants smaller position sizes. Above 50% means a small group can move the price unilaterally and is a strong reason to walk away unless you have a specific reason to accept that risk.
Conclusion: Five Minutes Is Cheap Insurance
Token contract verification in 2026 is no longer an advanced skill. The tools are free, the workflow is well established, and the cost of running through it is about five minutes per token. The cost of skipping it is whatever you were about to trade, multiplied by the probability you happened to click a scam, which on permissionless DEX environments is uncomfortably high. The math is one sided.
Build the seven step routine into your trading flow until it is reflexive: source the address from a trusted origin, open the right chain explorer, run two scanners, map the holders, check the liquidity, simulate the buy, and revoke after the session. Apply the proceed, wait, walk away rubric without negotiation. Pair this guide with our broader safety tutorials on wallet security, transaction simulation, and Permit2 token permissions to build a complete defensive stack.
If you want to extend the framework further, our companion guides on detecting fake volume in crypto charts and avoiding address poisoning scams cover the adjacent surfaces where the same vigilance pays off. The trader who consistently verifies before clicking is not the one who avoids every loss, but they are the one who avoids the catastrophic ones. That is what compounds.
Disclaimer: This article is for educational purposes only and does not constitute investment, tax, legal, or security advice. Smart contract risk evolves quickly and no verification process is a guarantee. Always do your own research and consult a qualified professional before making financial decisions.
Related Guides
- How to Verify Token Safety Before Buying: A Pre-Buy Crypto Checklist
- EVM Honeypot Prevention Checklist: What to Verify Before You Buy
- DEXTools for Crypto Journalists: How to Verify a Token Story Before Publishing
- How to Verify a Smart Contract Onchain: Step-by-Step 2026
- How to Analyze Solana Meme Coins Before Trading: On-Chain Risk Checklist (2026)